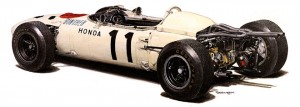
RA272製作記 2 -The modeling of HONDA RA272 vol.2
2015/09/20
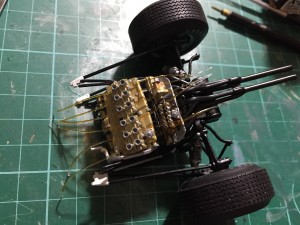
 エンジンのパイピング作業を開始しました。参考になる写真は多いのですが、細部までわかるものを探すのには苦労します。まずはインジェクションのような突起部につながる黒いパイプから。0.5mmの透明ゴムを瞬接で着けるのですが、イモ付けでは強度が取れず、後の細工ができないので0.5mmピンバイスでベースを作って接着しました。とりあえず曲げ加工ができる強度は取れたようです。
I started the piping of the engine. There are many photographs serving as a reference, but has a hard time to look for a thing to understand in detail. At first from a black pipe leading to an injection part. I put on transparent rubber of 0.5mm in superglue. For later work of 0.5mm pierce it, and put it on. I can bend a pipe in this.
 次にエンジン上部を這うパイプの接着。これはクリアオレンジをさっと塗ってみました。光沢が出過ぎですが、まあ良しとします。これを実車写真と見比べ曲げ接続。ところどころ浮きがでる部分とまとまる箇所を瞬接で固定。イメージ重視で行きます。
Then, I put on a pipe crawling on the upper engine. This pipe applied a thin coat of a clear orange. Luster appears too much, but is approximately same as my image. I put this on in the same way as a true car. A pipe loosens here and there. I fix them in superglue. I can go ahead for a self-image.
 一応つながりました。ブレーキコードも真鍮線でつけようと思いましたが、曲げ加工が難しかったので同じくゴム線で作ってみました。いい感じにたるんでくれて良かったです。しかし、瞬接の残骸が残って汚いですねえ。塗装でごまかすしかなさそうです。でも、自分のイメージが形になっていくのってほんとうに楽しいです。今週は残業続きでヘトヘトだったのですが、だいぶ気分転換になりました。さて、完成するかな?
All the pipes were connected first of all. I intended to attach brakes cord in a brass line. However, I made it with a rubber cord because the processing of the brass line was difficult. I think that I was able to make slack well. The remainder of the superglue is messy. It is covering it by the painting. It is really pleasant that a self-image becomes the form. Overtime work was tiring by work at most, but became refreshing by modelling this week. By the way, is it completed?

